Hey, this is Imanuel, founder of WP Companion and the creator of our Scotia Bank Payment Gateway Plug-in for WooCommerce. Today, I’m going to talk about one of the most common questions I get from new customers when purchasing our plug-in, and that is whether or not our plug-in can accept multiple currencies.
Now, the short answer to this question is yes, it can accept multiple currencies, but there are a couple things that you need to be aware of in order for it to work as expected. Just to get into the details, the first thing you want to do when signing up for your Scotia Bank Ecom+ account is to select the option to accept multiple currencies. For Caribbean islands in particular, most likely you will want to accept your local currency as well as US dollars. Ensure that when you’re signing up for the account you select USD and your local currency.
If you’ve already set up an account with Scotia and you previously selected to only accept payments in your local currency, you can always reach out to their team and they will assist you to set up an additional currency on your account. Once that is done, you now have the building blocks in place to accept multiple currencies, but there’s one more step that you need to complete in order to get it working fully. That is to configure your website to accept multiple currencies as well. So that’s what we’re going to do here today. We’re just going to go through the process of installing a quick currency switcher plug-in, and then I’m going to show you how it works and demonstrate the full process of accepting multiple currencies on your website. So, let’s jump in.
First, we’re going to the administrative area of our website and we are going to install one of the most common currency switchers available for WordPress.
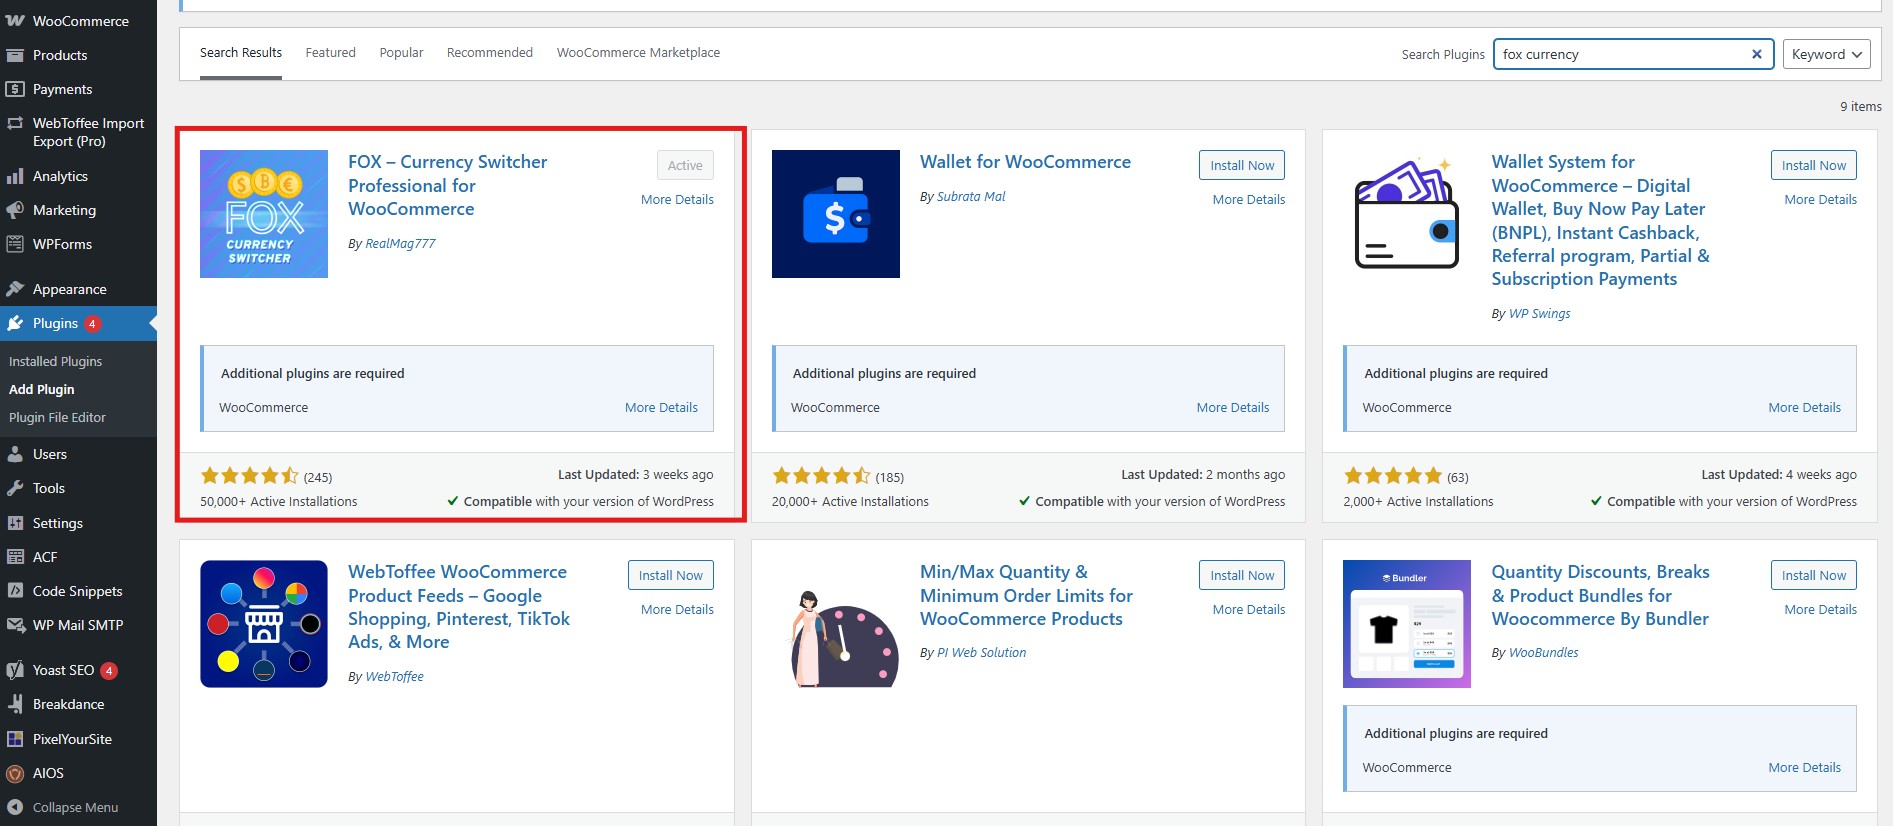
I’ve tested this plug-in with multiple websites and it works on all of them – it’s called Fox Currency Switcher Professional for WooCommerce. The free version of this plug-in allows you to accept two currencies on your website, which should be enough for most Caribbean merchants. If you do want to accept more than two currencies, however, you’re going to have to pay for the professional version.
Now that we have it installed, I want to highlight that the currency settings for WooCommerce has been moved. Generally, you would find your currency settings here (WooCommerce -> Settings -> Currency Options), but it will now give you this message that says you want to go to the new currency area to configure currency. You can either click the link right here or there is a new tab up top that says “Currency”.
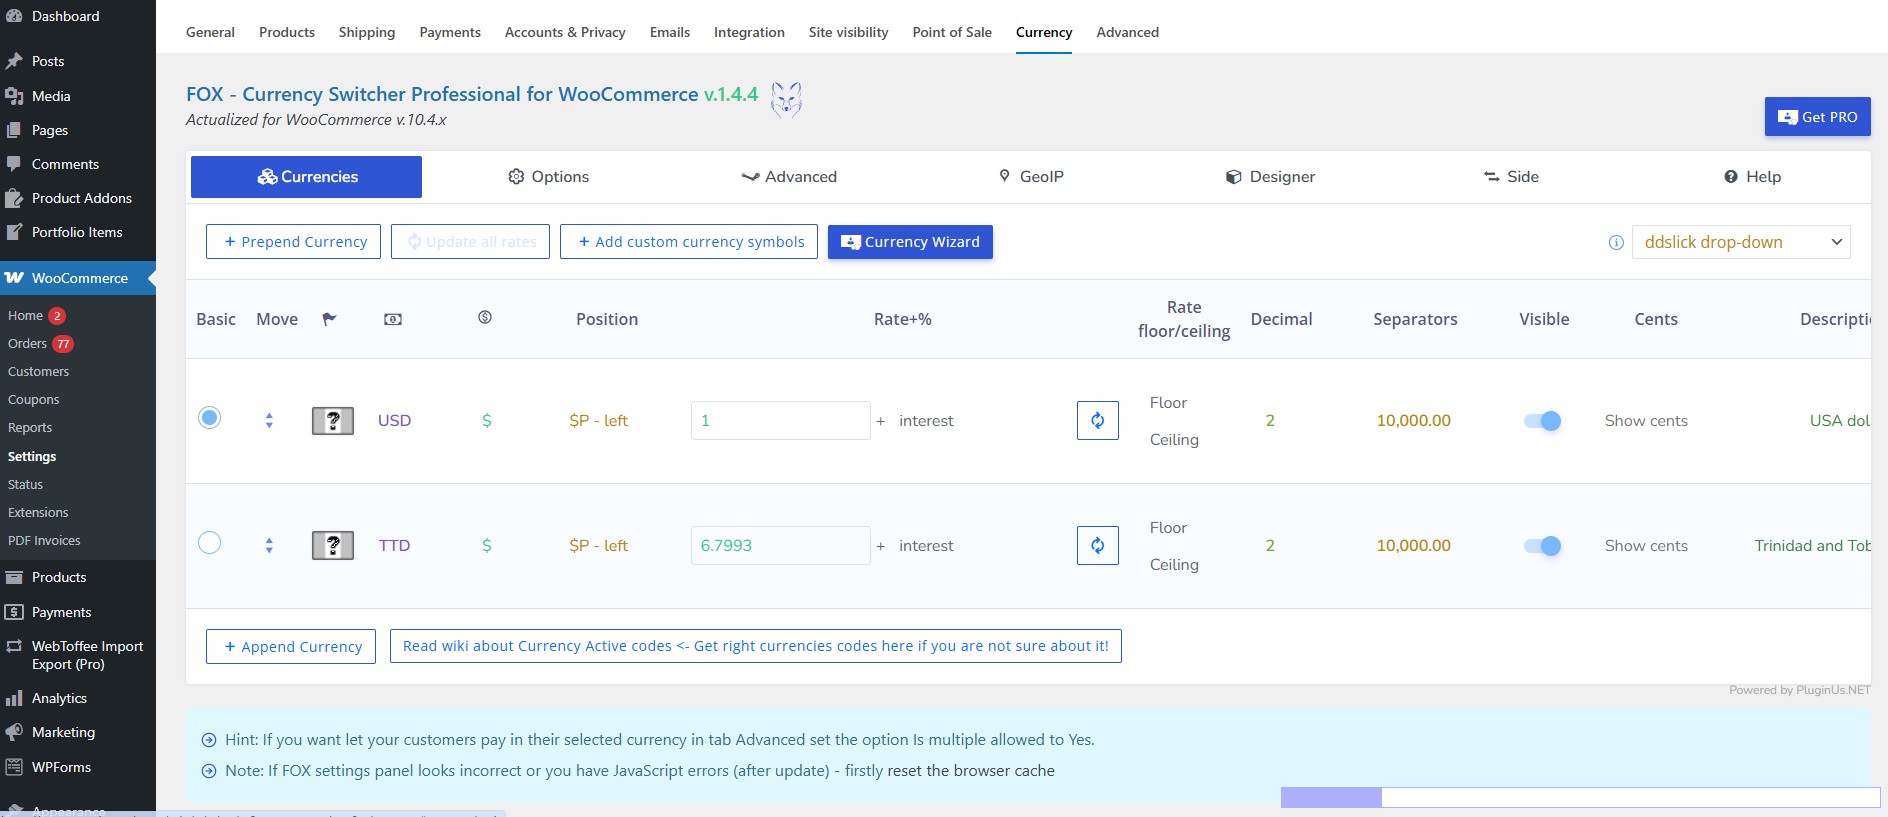
All right. So this is the interface for the Fox currency switcher (it’s a little bit jumbled), but let me just go through some of the settings here and everything will make sense afterwards. Okay, so like I mentioned, the free version of this plug-in allows us to accept two currencies on our website. I had this plug-in installed before, so it automatically set up USD and Trinidad & Tobago currency for me. But I think by default, it comes with USD and GBP. Let’s say you just installed this plugin and you operate in Jamaica. First, you need to change the currency here. (Change GBP to JMD).
This plug-in also allows you to set a custom currency symbol. This is a great feature because we have the regular dollar, we have pounds, we have Euros, etc. But we don’t have our currency regional symbols by default in this plug-in. And I would have added two custom symbols before (TTD $ and USD $), and I will show you how to add those afterwards.
Let’s just use the regular dollar sign for now for USD and we also use the regular dollar sign for Jamaican dollars. This plug-in also fetches currency conversion rates. Just click the refresh icon, and it should load the correct conversion rate. If this conversion rate isn’t correct, you can also manually adjust it. Let’s just say Jamaican dollars was 156. You could set that, and you can save this change.
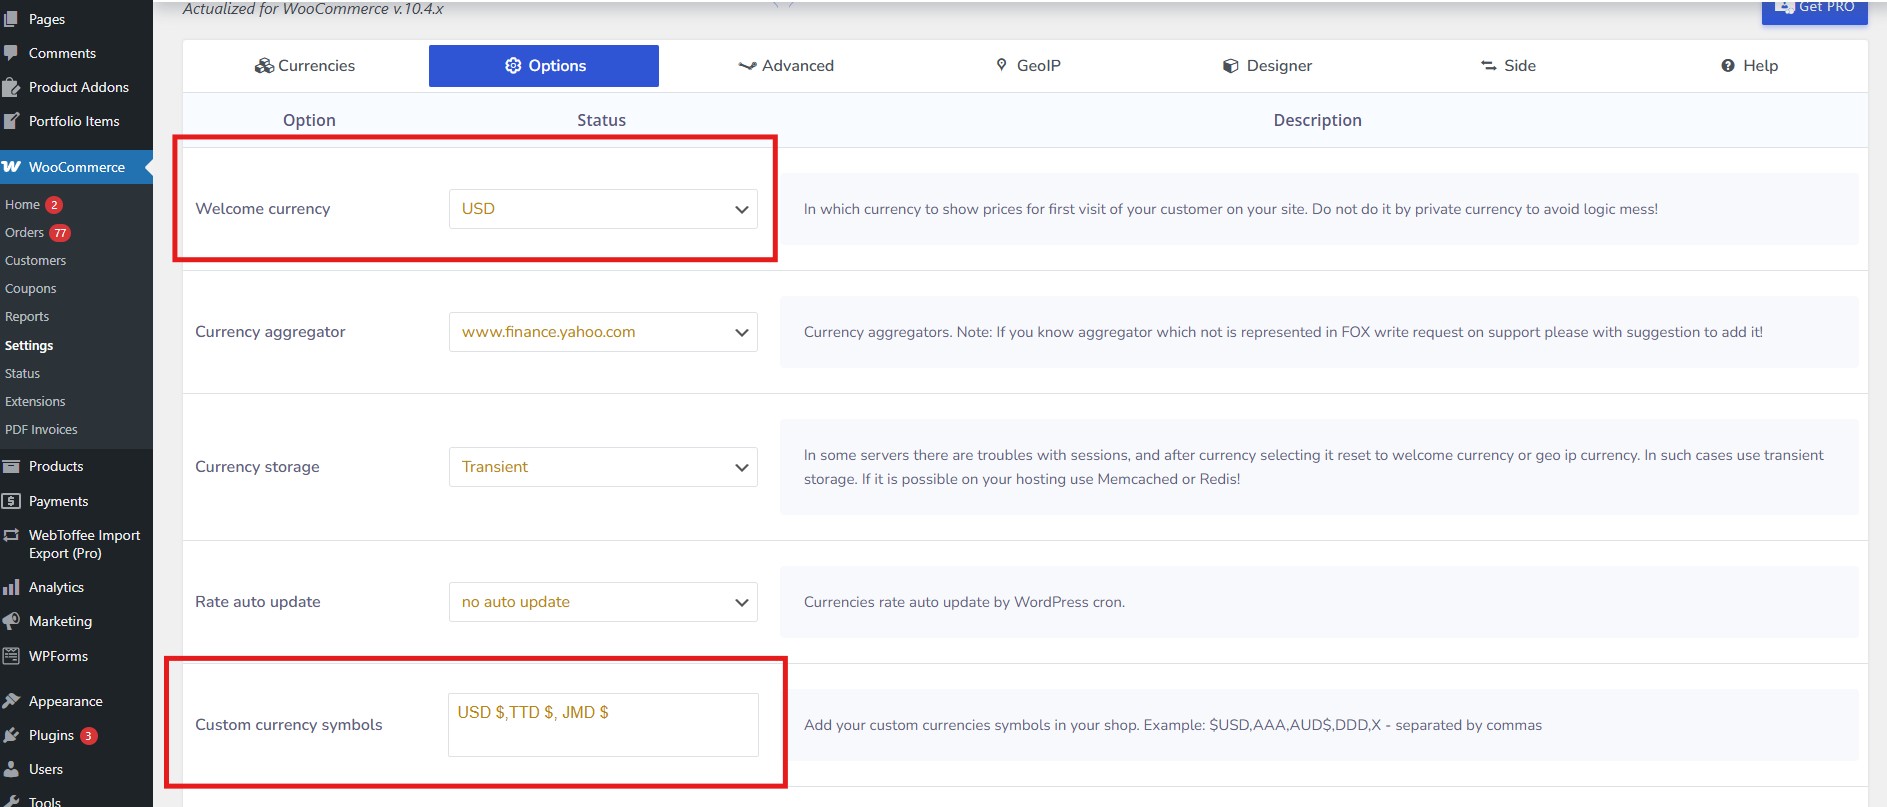
Okay, let’s just take a quick look at some of the other options this plug-in has. It allows you to configure a welcome currency. That means that the first time one of your visitors lands on your website, this is the currency that will be shown by default. We have USD configured as the welcome currency here but you can set it to any currency you like. You can choose a different currency aggregator. I always leave it on Yahoo Finance. I’m going to skip a couple of these options because they aren’t important for what we’re talking about today. But the custom currency symbols feature is important. Here I can set up JMD with a space and a dollar sign (JMD $) to show Jamaican dollars, for example.
Mainly, we want to configure our currency symbols and our welcome currency on this options page. And then we’re going to save. There’s one final setting that I want to highlight, which is very important for what we’re about to do here. And that setting allows customers to check out in the currency that is chosen.

It says “Is multiple allowed” and the description says customers will pay in the selected currency. Now you need to make sure that this is selected as “Yes” because if it’s selected as “No” then your website will always check out in the default currency, whether or not the visitor has chosen the additional currencies that you add. So, you want to just make sure that this is set to yes, and you save your options here.
Because my account has been set up for Trinidad and Tobago dollars and USD, I’m just going to reconfigure this page to Trinidad Tobago dollars. I’m going to manually set our rate. And I’m going to save these changes.
Great. Now, this currency switcher has a shortcode “woocs”. And what I’m going to do to demonstrate this is to add this shortcode to one of the test products that I have. In the product description area, I’m just going to add the shortcode.
In the description of my product, I now have a currency switcher. Note: most people would put a currency switcher in a global area of their website, like the header which is one of the most common areas you see currency switchers on websites. You can always include this shortcode there once you have access to edit the header and footer of your website.
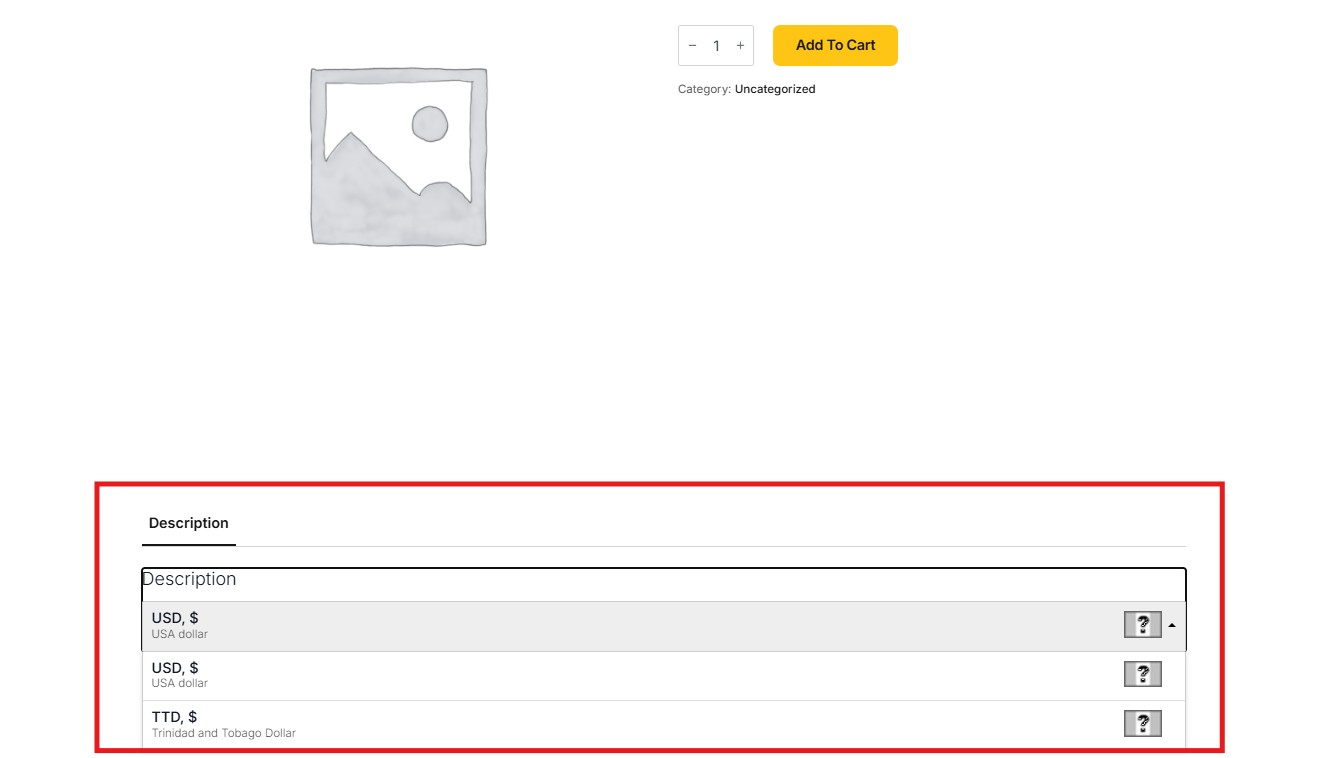
This is what the interface for your currency switcher looks like. By default, as we configured in the back end, it starts with US dollars, and you have the option to change to TT dollars. Now let’s just change to TT dollars and see what happens to the price. You’ll see that the page refreshes and our price has been updated. So, what I’m going to do is add this product to the cart and checkout in TTD.
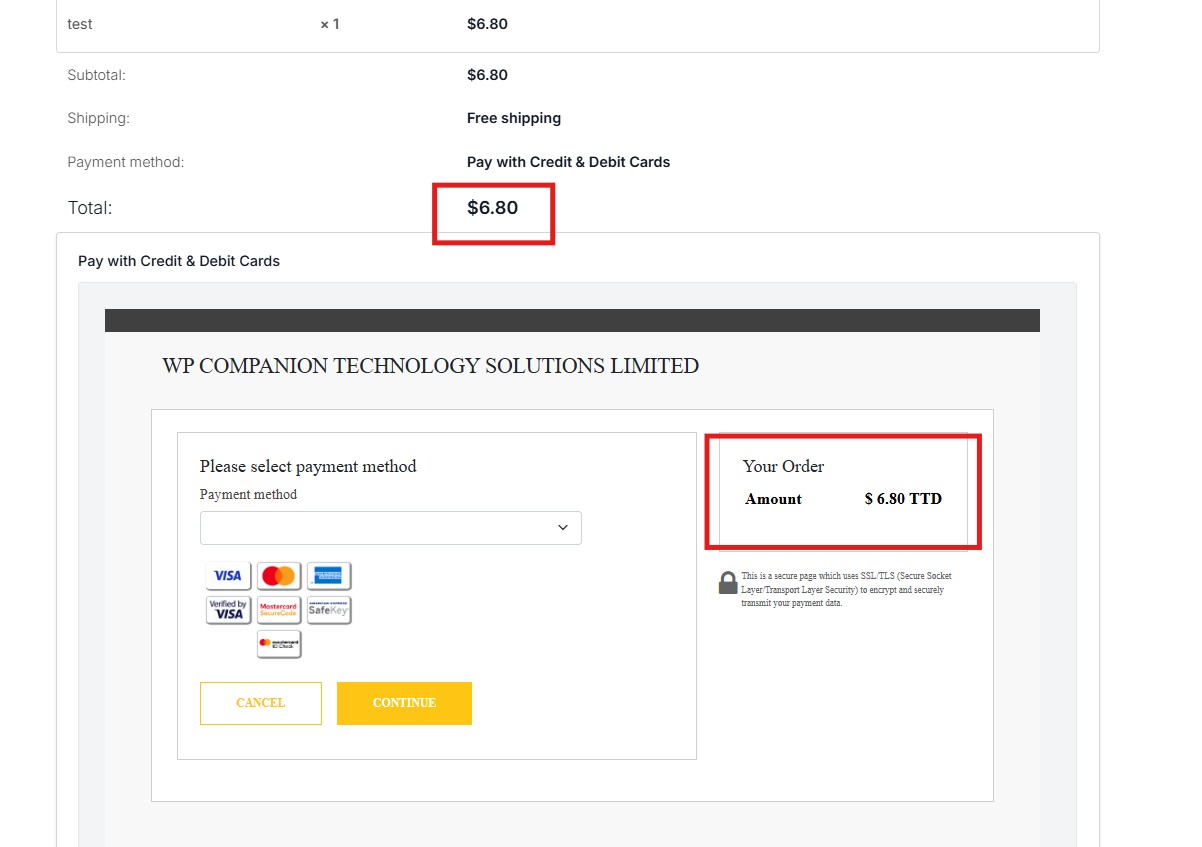
The payment page has load loaded successfully and what is important here is that we see the same amount in our checkout total with our total in the embedded payment page as well as the correct currency.
Let’s do the same thing, but we’re going to do that in the US currency
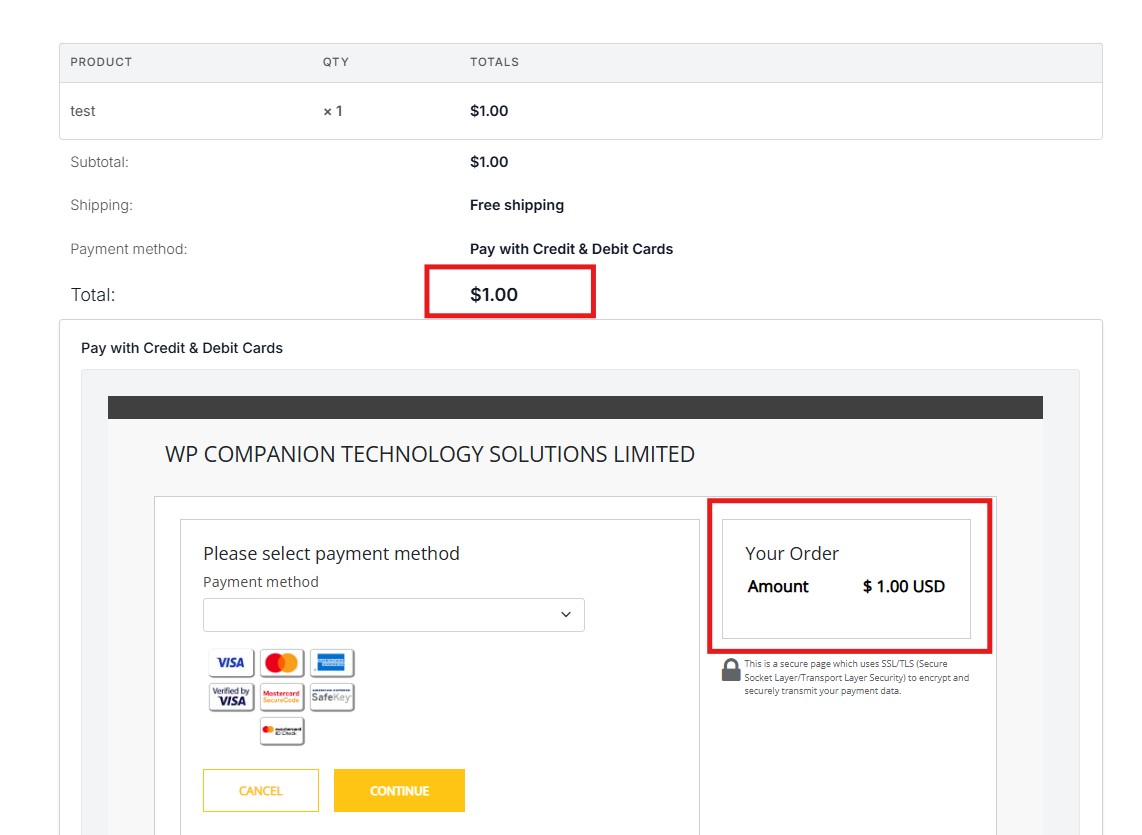
Okay. And here we have our payment page loading again, but this time we have the same amount in our total here in USD currency.
So that is pretty much it. Once you’ve configured your Scotia Bank account to accept multiple currencies, all you need to do is install a currency switcher on your website and provide a reliable way for your customers to switch currencies and you should be all set up to accept multiple currencies online.
If you need any additional help with anything WordPress as well as getting your online store up and running, we’d be happy to help. Reach out to us via our contact page or at info@wpmpanion.co and we’d be honored to get that conversation started.
Have a great day!